Choosing New Fret Size
Needed Fret Tools
Preparing the Guitar
Fret Removal
Fingerboard Leveling
Fret Slot Cleaning
Preparing the Fret Wire
Creating a Radius
Cutting and Tang Removal
Installing New Frets
Glued in Frets?
Installation Method
Fret Dressing and Beveling
Fret Trimming
Fret Beveling
Fret End Dressing
Final Leveling
Results from Larger Frets
Tone
Feel
Why Bigger Frets?
If you are familiar with classical guitars, you have probably noticed many of them come with really short and narrow frets. Even well made high end guitars have the typical .080″ wide fret wire. Actual nylon strings, the strings, not the guitar they are on, are usually larger in diameter than steel strings. 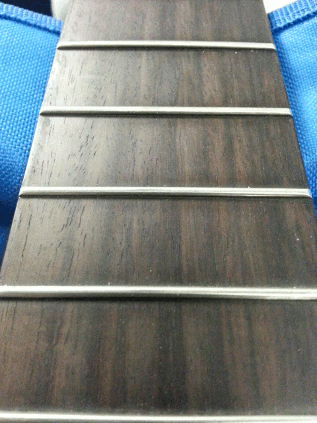 So why do they fit the fingerboard with skimpy, paper-clip sized frets? Two reasons…it’s traditional, and cost effective. The feel and tone of an instrument can be enhanced with more substantial fret wire, and this article will cover installing bigger frets on classical guitars.
As it goes with anything guitar, it comes down to player preference. Some folks are used to smaller fret size, while other players who may come over to classical guitar from flat-top acoustics or electrics will quickly notice a difference. If you are interested in doing a refret yourself, it may benefit you to head over to a local music store and pick at a few guitars with a bigger frets. Although it’s not your regular instrument and action, it can give you some understanding about what differences fret wire can make.
Choosing New Fret Size
If your certain bigger frets are what you want, how do you know what wire size to shop for? This article can’t tell you what size is best. This is where some research is needed. The fret market has numerous sizes and shapes so you need to know what’s what. There are terms such as small, medium, and jumbo. Each manufacturer has it’s own language per size. The best procedure is to get an inexpensive caliper (or a really nice one if you want) from the nearest tool store. This is a machinists tool for measuring very small distance. Take your favorite guitar with frets you like the feel of when playing, and measure the fret’s height and width. It doesn’t matter if it’s an electric or acoustic because we can install any size onto the classical guitar. Try to measure the upper frets near the body as they probably haven’t been leveled or worn down much. This is a starting reference for doing your research. Fret wire is measured in standard sizes and metric in thousands of an inch and millimeters. For example, Jascar wire labeled FW51108 is .051 inches high, and .108 inches wide. This would generally be considered jumbo when it gets to the .100″ size. See why you measure your favorite frets? Dunlop has their own part numbers as well, but it really has to do with the size you measured and match that the best that is available.
There are many manufactures to buy from so read reviews and find a source you can trust and prefer. Some folks like Dunlop, some like Jascar, and reviews are good for learning the current crop of quality from most of them. Fret wire can be purchased from directly from the makers or any online retailer. A great Dunlop chart is available as well as a Jascar chart too. Luthier suppliers have some quality wires too.
Wire can be bought in a few different arrangements. There is straight lengths of generally 2 foot sections, and there is pre-radius wire as well. The pre-radius wire is useful, but can be a disadvantage if it’s not exactly the correct radius for your fretboard. The 2ft pieces can be arched and cut easy enough so it’s not a big deal to get it pre-cut.
For this project we chose the FW47095 wire from Jescar measuring .095 x .047 inches. Why? As mentioned above, we took a guitar that fells great to play and measured the frets with calipers. This other guitar is a 98′ Gibson SG with .090″ wide wire. So for our simple Cordoba C5-CET classical guitar we went with a tad wider fret size figuring the large nylon strings would do good with that extra material. In simple terms it’s a medium-jumbo rating. This is basically a starter model in the realm of classical guitars. It has decent materials and workmanship and can be a lot of fun to play being a thin-line version of the brother model C5CE.
Must-have Fret Tools
To accomplish a clean re-fret on any guitar, there are some select tools that are a must. Some can be created at home and some you should just spend the few bucks to purchase them. Watching some YouTube videos it may look like any old tool will work. Eh, no. Using a knife blade for fret removal for example, will probably leave dents and scratches in your fretboard and maybe your fingers too. Here we cover the tools to do it right.
- Fret Pullers- An absolute must. The good news is these are very inexpensive. This tool in not the same as end-clippers. These jaws are shaped specifically for wedging under frets and create a lifting effect when used correctly.
- Fret Slot Scraper- A scraper is needed to remove debris from the fret slots after old frets are removed. Any little chunks or even dust can get in the way of the new tangs seating correctly and may cause high spots that need excessive leveling later on.
- Fret Depth Gauge- Another home made tool that is very simple to create. Even a straight razor will work fine. Make a mark on the gauge for the new fret tang height.
- Radius Tool- This can be made at home or bought online. The little hand crank machines that radius wire are great if you do lots of re-frets. A simpler solution is to drill a 1/2″ hole into a piece of wood. More on that later.
- Soft Face Hammer- A lot of luthiers choose a brass dead-blow hammer for the actual hammering in of the frets. A nylon faced hammer can be purchased at most home stores and will work great for driving in frets without damaging them.
- Soldering Iron- You will need some heat to soften the old fret glue if there is some present. Glue isn’t always used but heat is the only thing to loosen it up. Also the heat helps soften the fingerboard material making fret removal a less destructive procedure for the guitar.
- Beveling Block- A beveling block is used to angle the ends of the frets to 30°- 45° so there is a smooth feel without scraping your hands. There are some pre-made blocks that have files fastened to them. If you have a circular saw or table saw you can dial in the correct angle and make your own beveling block.
- Leveling Beam- If you work on your own guitars, you should have one of these. A leveling block is precision ground to as flat as flat can be. It’s great for fret levels, saddle and nut sanding, and making shims too. Don’t have one? Get one.
- Course and Fine Files- Having some course and fine files are necessary to dress the ends of the frets. A good hand file can be used as the beveling file, and a small triangular can be used for the edge dressing with some modification.
- Sandpaper- Sandpaper of a few course and a few fine grits will help finish the job by removing file scratches and also it is used for fret leveling. Typically some #220, #600, #800 and #1500 will get the work done.
- Masking Tape- The fingerboard and guitar body will need protection from the work being done and simple masking tape will do great to keep sandpaper away from things that don’t need sanding.
- Polishing Compound- The polish is for the frets after all filing and sanding work is done and all that needs removed is the fine #1500 grit scratches. We actually used some rubbing compound for auto body work and it has makes a nice mirror shine result. Any decent metal polish will work too.
- Fretboard Oil/Cleaner- This is the final step and makes things look new and fresh.
Preparing the Guitar
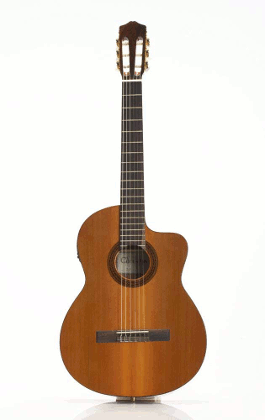 As stated in our How to Hot Rod Your Nylon String Guitar page, our subject guitar is a Cordoba C5 CET thin-body classical. Stock it has the typical higher action for clean picking. Well, we brought the action down and it still needed something. After some thought, the one thing that stood out was the narrow little frets. When digging in and playing fast, the frets were not helping with getting a good tone and there was some occasional buzzing.
Now we have the wire, and the proper tools. All that’s left is to prepare the guitar. Time to pull out the old frets. Yippie! Ok, seriously it’s time to settle the excitement and focus. This first part is going to take patients and a smooth steady hand. There is no ‘magic trick’ replacing frets. It’s actually easier than you might think. Ready?
Guitar Accessories for any level.
Fret Removal
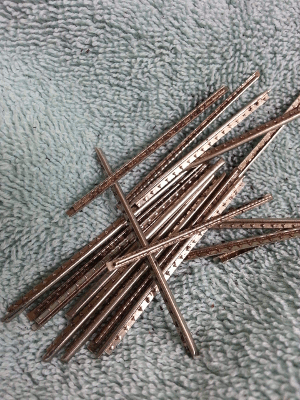 Let’s get them skimpy frets out. For simplicity we start at the short 19th frets. The goal is to slowly work the frets out to prevent the fingerboard from chipping or lifting out small bits of wood at the edge of each fret slot. First step is to heat up the soldering iron. Some folks will put a notch into the tip to prevent the iron from slipping off the fret and making contact with the fingerboard. It’s up to you. A steady hand resting on the guitar will work too, just be careful.
When its up to temp, slowly run it along the fret back and forth. Some subtle smoke may come out from previous glue boiling, or you may see the fingerboard color start to haze just a bit. Don’t overheat the fret as it may discolor the fingerboard. When it’s warmed up, place your fret pullers at the very tip of the fret and only use an 1/8th of an inch of the pullers jaws at first.  Squeeze and allow the pullers to lift the fret while you lightly push down on the fingerboard. Keep the pullers square down on the board so any loose wood chips won’t lift up with the fret. Work along the fret a little at a time until the entire fret is lifted. Continue with each fret until they’re all out. Work slowly for the cleanest results.
Fingerboard Leveling
Now that the frets are out of the way we can do some fingerboard prep. Leveling the board is only really necessary if there are chips that need glued down, or maybe you want to add some radius. We gave our board more radius for comfort. Also being a lower end instrument it needed a little leveling anyway. If chip-out does occur, get the super glue out and do your best to glue down the chips. After sanding the places there were chips will be almost invisible. 
To accomplish leveling with a radius the preferred method is to use a pre-radiused block. A leveling beam can be used if care is taken. Running the beam along the path of each string will help keep the radius correct, but to add radius you will need to do more leveling at the low and high side of the finger board. For example, do one pass for the D string, two for the A string and 3 for the low E. This will take more material off the outer sides of the fingerboard and make a greater radius. Do the same for the treble strings as well.
Fret Slot Cleaning
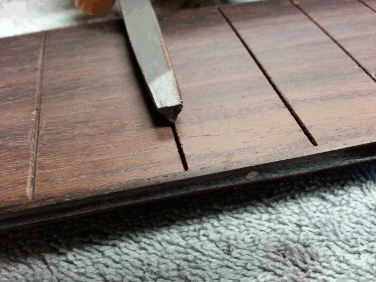 After the board is smooth and leveled, (and it will look really good too) the slots for the frets need attention. Any old glue or any debris left from fingerboard chips must be removed from the slots so the new fret tangs will seat properly and a beveling of the slots must be done too. Beveling the slots helps eliminate chipping if frets ever need replaced again in the future. Take your triangle file and draw it along each slot just enough to put an ever-so-slight edge on each side of a slot.
Now we can clean the slots. This may need done several times during this whole process. For this guitar we did a scraping and cleaning four or five times to really get all the wood dust and chunks removed. We used an old metal surround or bezel for a car radio display. The metal was about .020″ thick and it was easily shaped with a bench grinder into a hooked blade perfect for lifting out chunks of wood and glue from each slot.
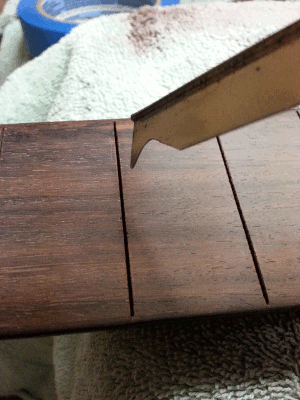 Carefully drag the slot tool along each fret slot being careful of the ends and remove any bits and dust. A guitar with fingerboard binding means you have to scoop out material rather than just pushing material out the end of the slot. Again, this may need done several times with all the slots. When your confident the slots are cleaned, take the depth gauge and check each and every slot to ensure debris doesn’t remain and also after any leveling that was done it hasn’t made the slots too shallow for the new tangs. Also if they are too deep it could leave voids under the frets which isn’t desired for a resonating musical instrument. A slot too shallow will need cut deeper with a saw blade, or the fret tangs will need shortened.
Preparing the Fret Wire
Next we need to prepare the wire for the fingerboard. There are three things that must be done for a board with binding. One is create a radius to the wire. Second is to trim each fret to size, and third is to remove the tang under the ends so the fret wire will sit on top of the binding.
Creating a Radius
Many luthier companies sell radius machines and the work great, but it’s not needed if your only doing a guitar or two. For our project we made a simple tool to get the job done. For reference, this classical guitar had a nearly flat fingerboard but we added some radius up to about a 24″ radius for a little smoother feel in the hand.
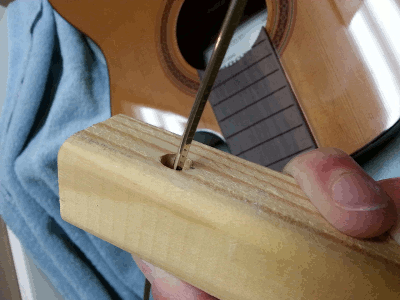 We took a scrap piece of deck railing measuring 1″ x 1″ x 12″ and drilled a 1/2″ hole near one end. Orient the hole at the top and place the wire with the tang down and simply pull the fret wire through the hole with a little downward pressure as you pull. The more downward force you use the more radius you will create. Do it a few times to get every part of the wire nice and curved. This will arch the wire in an even fashion. You will want more curve than what the fretboard is radiused. This way when the frets are installed they will not flatten too much and lift at the ends.
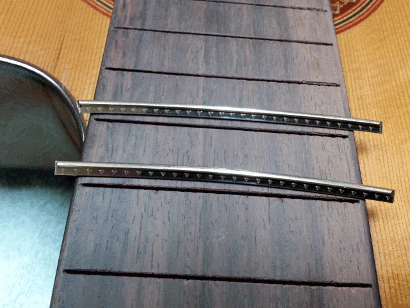 Bending the wire by hand could be done but won’t give a consistent result and there may be high and low points from your hands.
Cutting and Tang Removal
Now the radius is where we want it, the time has come to cut the wire to approximate length and remove the tangs at the binding. It’s a good idea to know ahead of time how you will arrange all these loose pieces. 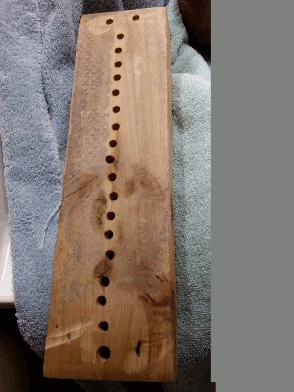 We used a block of wood with 20 holes so each new fret could be stored without a mix up. You may just lay them out on a table which is fine. Just don’t bump the table! Begin working at the higher frets as those are typically longer, and if you do cut one too short it can be used for one of the lower frets without wasting your wire. Lay the fret wire across the fret slot and trim it to about an extra 1/4″ or so on each end so there is plenty to work with.
When the frets are all cut, take one at a time and mark the tangs for the slot between the bindings. Leave a little wiggle room for expansion during temp changes so they won’t bulge out the binding should that occur.
Now the frets are marked, its time to file off the tangs that would sit where the binding will be. To accomplish this a tang cutter can be purchased, but again, doing only one or two guitars there is a less expensive way. 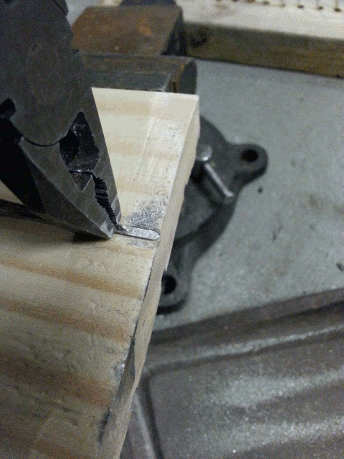 Take a scrape piece of wood about 6″ wide and clamp it in a bench vise or secure it right to the bench. Put a groove into it so the fret sits upside-down with only the tang exposed upward. Now take a good set of pliers and hold the tang where you made your mark. Take a good hand file and file down the tang until most of it is removed. The groove should keep the file from taking off too much and cutting into the crown of the wire. That would leave a gap under the fret so be careful. Now take a fine file and finish filing the tang leaving a nice smooth surface. Do this for all the frets. The process takes some time as does anything worth doing.
Installing New Frets
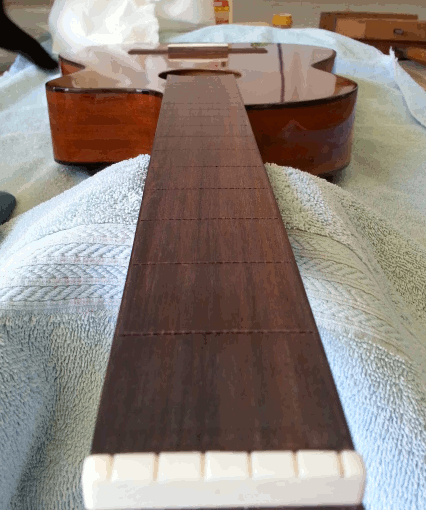 Ok, whew, the guitar is ready and the new frets are ready, it is finally time for installation. The next few steps can be rough on a guitar if patients is ignored. Countless debates are on the internet as to which is the best method. The best method is the one you choose.
Glued in Frets?
For this guitar we chose Titebond wood glue with the red label. The concept is not to hold in the frets, but to fill any gaps that may occur under the new wire. The tangs and tiny spikes on the tangs are what hold the frets in place. A nice solid neck without air gaps is a pleasing thought and that’s what we’re going for here. Others prefer CA super glue and that works great also. PRS guitars claim to use superglue just for reference. Other builders don’t want any glue because they believe they are experts in fit and finish. That’s great too.
Installation Method
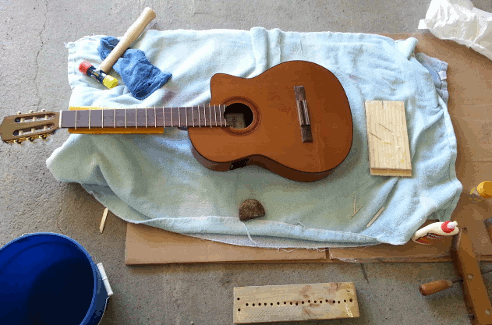 Starting with the small half frets at the nineteenth slots will get you warmed up. So for our glued in frets, take a toothpick and dab it in a small puddle of wood glue. Drag it along the fret slot and allow it to flow down into the slot. Get the ends so frets won’t lift up in the future. Take your appropriate fret wire and position it where you want it. Now take your soft face hammer and tap it in starting at the ends to seat it, and then tap in the middle and work toward the ends. The goal is to keep the radius and avoid flattening the wire. You’re not driving nails, your seating frets so small force will work. Seat it flush with the fingerboard. Now continue with all the frets. Not too hard eh?
Fret Dressing and Beveling
To get a nice, smooth playing neck it takes some filing and beveling of the fret ends. This next section walks though what was done to accomplish this. Protecting the guitar body and neck are important to keep any unwanted file movements from causing damage.
Fret Trimming
Since the frets are installed the need trimmed and there are several ways to do this. The most important thing to do is trim them close to the fingerboard without deforming them.  Side cutters or end cutters can be used just don’t make the fret wire mash up inside the slot because that would lead to the wire rising up off the fingerboard. At that point the fret would need redone to correct the deformation.
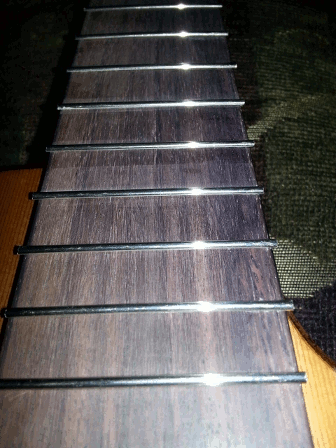 We simply tested a scrap piece of fret wire and found side cutters do great when aligned properly to the crown of the wire. The frets were all trimmed to about an 1/8th of an inch so as not do get any deformation and still make them short enough the file can do its job smoothing the ends to the binding edge.
Fret Beveling
Once trimmed, the frets can be beveled to an appropriate angle. The angle is a preference thing. Anything from 30° to 45° will feel natural and work well. Find one you like and go with that. Our guitar got an approximately 33° angle since it was discovered after research that Gibson used nearly 35° for most electrics.
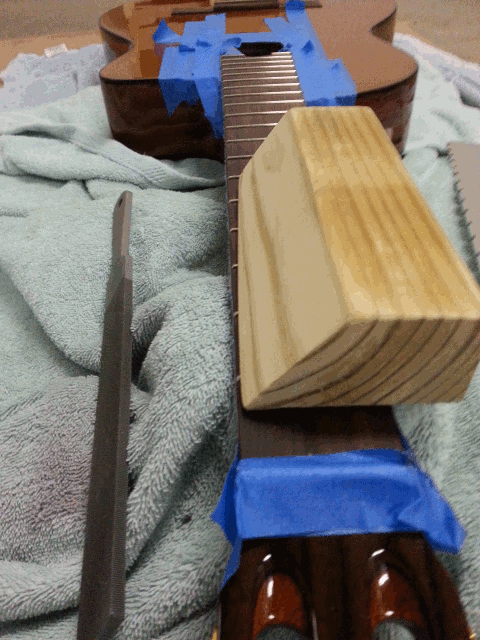 There are some great tools to make this job simple and mess free. Because this is the only guitar at the moment getting a re-fret, we went with the home made tool option. Taking a scrap piece of wood again we cut it with a circular saw to the correct degree making it our guide block. The piece is about 8 inches long and 2 inches deep. Its wide enough to cover the entire width of the fingerboard so it sits on top and doesn’t want to roll off the edges when filing. With the guitar steady, hold the hand file against the angled wood piece and slowly draw the guide and file along the fret ends. It will be rough cutting until the bevel starts shaping the ends and then simply take them down to binding. Putting a small bevel on the binding will only make the feel similar to rolled edges of a Fender fingerboard so don’t worry about getting it precise to the binding. This step takes patients and a lot of slow time to finish right.
Fret End Dressing
After beveling is down to the binding, its time for the small triangle fie again to come on to the field. We ground down one side and smoothed it out so it can ride on the fingerboard and not cut the surface. Use it to round the sharp fret end corners left after the bevel filing. After the end filing is done you can take some sandpaper of 800 or greater and round the ends to an even greater comfort level. These steps give your fretboard that ultra smooth feel and prevent cuts on your hands.
Final Leveling and Polish
After all your hard work it is finally time to do a fret leveling and polish. The leveling beam is used to level the frets and a crowning file is used to bring back the round shape after flatting occurs with the beam. Take the usual steps to get a good level job done and finish off with a fret polish with rubbing compound of metal polish. There are lots of good YouTube examples of fret leveling so we aren’t going to in-depth here. Also some fretboard oil is good to end with also.
Results from Larger Frets
 Tone
Tone
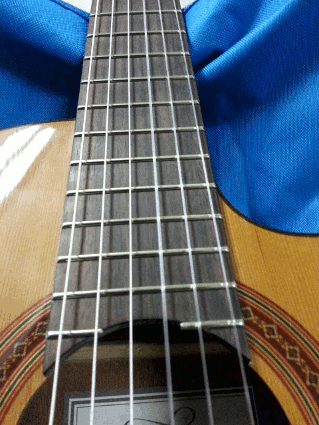
After tuning up to pitch there is a noticeable difference right away. The tone does have more body and depth. Sustain form the bigger frets is nearly the same. There really isn’t any difference than the stock guitar. Tone is different to a point. It might seem the same strings would sound the same, but the extra metal and mass really give the strings more area to resonate into the neck of the guitar. The tone of the nylon strings are less of plastic and more woody and wholesome. It give an increased warm tone and not so plucky.
Feel
From personal experience, when playing on the old frets, my fretting hand has to apply more pressure to eliminate buzzing, and it’s especially obvious making barres across the fingerboard. The fingers have a natural radius or arch when in a relaxed state, and larger fret wire helps remove the gaps under you fingers due to a taller fret filling in the gaps. T
